Custom GL Mapping — Making an Integration Work Within Your Sage 50 Setup
Why generic integrations fail on custom charts of accounts, and how flexible GL mapping gives you the integration you actually need.
Most integration tools work with a generic assumption: You have one revenue account. You have one tax account. You have one AR account. Orders flow in and land in the same place.
This works if your business is simple and flat. But most aren't.
If you have separate product lines, multiple sales channels, geographic split, or customer tiers, your chart of accounts is custom-built to reflect that reality. Your Sage 50 GL structure is intentional. Flattening it to fit a generic integration defeats the whole reason you built it that way.
This is where custom GL mapping becomes essential.
In this guide:
- Why generic integrations fail on custom charts
- What custom GL mapping looks like
- Common mapping scenarios
- How to set it up
- What to avoid
- FAQ

Why Generic Integrations Fail on Custom Charts
Here's the typical scenario: You've spent years building a chart of accounts that reflects how your business actually works. You have separate revenue accounts for each product line. You have different AR accounts for wholesale vs. DTC. You have tax accounts split by jurisdiction.
Then you implement an integration tool. It says: "Choose your sales revenue account" (singular). You pick one. Every Shopify order now goes to that one account, regardless of whether it's a hat, a scarf, or custom wholesale.
You're back to the manual workaround: let the integration dump everything in, then spend an hour per week reclassifying invoices to the right GL codes. The automation is gone. The friction moved, didn't disappear.
The Real Costs of Generic Integrations
Lost reporting: If all Shopify revenue goes to one account, you can't see DTC revenue by product line. Your board reports are useless. You go back to pulling numbers from Shopify directly.
Manual cleanup: Every import means post-import reclassification. Someone on your team spends 30-90 minutes per week moving GL entries around.
Audit headaches: When you need to trace an order back to its GL entry, you have to search across multiple accounts or dive into invoices individually.
Decision delays: Your CFO can't pull a quick report on "how much did hats sell this month" because it's scattered across accounts. Decisions wait for IT to build a custom report.
Process debt: You've been "meaning to fix the GL structure" for two years. Custom GL mapping eliminates the excuse.
What Custom GL Mapping Looks Like
Instead of "Choose one revenue account," Sagify asks: "How should I route orders?"
You define rules. Those rules are applied at import time. Each order lands in the right GL account from day one.
The Components of a Mapping Rule
A mapping rule has three parts:
- A trigger — "If the order matches this criterion..."
- An action — "...then route it to this account"
- A fallback — "...otherwise, use this default account"
Common Triggers
- Product line: "If SKU starts with HAT_, route to revenue account 4000-Hats"
- Sales channel: "If order is from Shopify, route to 4100-Online; if from wholesale form, route to 4100-Wholesale"
- Customer type: "If customer tag is 'Wholesale', route to 4200-Wholesale Revenue"
- Geographic: "If shipping address is in Canada, route to 4300-CAD Sales"
- Order metadata: "If order total exceeds $5,000, route to 4150-Enterprise Sales"
- Combination: "If product is HAT_ AND customer tag is BULK, route to 4250-Bulk Hats"
The Outcome
Your GL ledger stays clean. Your chart of accounts continues to tell the story of your business. Reports are meaningful on day one.

Common Mapping Scenarios
Scenario 1: Separate Revenue by Product Line
Your setup:
- Product line A: Hats → Revenue account 4000
- Product line B: Scarves → Revenue account 4010
- Product line C: Accessories → Revenue account 4020
The mapping rule:
If SKU contains "HAT-" → send to 4000
If SKU contains "SCARF-" → send to 4010
If SKU contains "ACC-" → send to 4020
The result: Orders automatically split to the right revenue account based on product SKU. You see hat sales, scarf sales, and accessory sales as separate line items in your profit and loss.
Scenario 2: DTC vs. B2B Split
Your setup:
- DTC (Shopify): Revenue account 4100
- B2B (wholesale): Revenue account 4200
The mapping rule:
If order source is Shopify → send to 4100
If order source is wholesale portal → send to 4200
The result: Your gross profit report automatically shows DTC vs. B2B contribution. You can compare margins without manual adjustment.
Scenario 3: Multi-Currency by Geography
Your setup:
- USD sales: Revenue account 4000-USD
- CAD sales: Revenue account 4000-CAD
- EUR sales: Revenue account 4000-EUR
The mapping rule:
If billing address is in US → send to 4000-USD
If billing address is in Canada → send to 4000-CAD
If billing address is in EU → send to 4000-EUR
The result: Currency-based revenue is automatically split. Your consolidated sales report is accurate without manual currency adjustments.
Scenario 4: Wholesale Tiers
Your setup:
- Standard wholesale: Revenue account 4200
- Preferred partner wholesale: Revenue account 4201 (might have different margin targets)
- Distributor: Revenue account 4202
The mapping rule:
If customer tag is "Wholesale Standard" → send to 4200
If customer tag is "Wholesale Preferred" → send to 4201
If customer tag is "Distributor" → send to 4202
The result: Your wholesale strategy is embedded in your ledger. You can see which channel is performing and which is profitable.
Scenario 5: Tax Jurisdiction Mapping
Your setup:
- Sales tax (states): Tax payable 2100
- GST (Canada): Tax payable 2105
- HST (Ontario): Tax payable 2110
The mapping rule:
If customer address state is in US sales-tax states → send tax to 2100
If customer address is Canada (non-HST) → send tax to 2105
If customer address is Ontario or other HST provinces → send tax to 2110
The result: Your tax accrual is automatically organized by jurisdiction. Month-end tax filing is a matter of reading your GL, not rebuilding from scratch.
How to Set It Up
Setting up custom GL mapping happens during Sagify configuration, but it's not a one-time thing — you can adjust rules anytime.
Step 1: Map Your Chart of Accounts
Before you configure Sagify, document your GL structure:
- What revenue accounts exist?
- Why does each exist? (product line? channel? customer type?)
- Are there existing rules that govern which account an order goes to?
Step 2: Identify the Trigger
What attribute of the order will determine routing?
- Is it in the product SKU? (Best — SKU is consistent and auditable)
- Is it in customer tags? (Good — customer tags are controllable)
- Is it in shipping address? (Works — geographic data is reliable)
- Is it in order metadata? (Custom — only if you've set up metafields)
Step 3: Define the Rules
Tell Sagify the mapping. Examples:
- "If product SKU starts with W_ → revenue account 4000"
- "If customer Shopify tag equals Wholesale → revenue account 4200"
- "If shipping country equals CA → revenue account 4050-CAD"
Step 4: Test
Run a test import with your mapping rules active. Verify that orders landed in the expected accounts.
Step 5: Go Live
Once verified, you're running live. New orders are automatically routed. You're done.

What to Avoid
Avoid: Too Many Rules
More than 10-15 rules becomes hard to maintain and troubleshoot. If you find yourself needing 20+ rules, simplify your chart of accounts or consolidate similar categories.
Avoid: Relying on Inconsistent Data
Don't build a rule on a field that varies inconsistently. For example, "if customer notes contain X" is fragile because notes are free-form and change over time. Use structured data like SKU, customer tags, or address.
Avoid: Rules That Conflict
If you have overlapping rules (two rules that could apply to the same order), Sagify will flag it. Resolve conflicts by making rules more specific.
Avoid: Forgetting the Fallback
Always define a default account for orders that don't match any rule. Unmatched orders that have nowhere to go will fail. A fallback ensures the import completes and you can review exceptions later.
FAQ
Can I change my mapping rules after I've imported orders?
Yes. Mapping changes apply to future imports. Historical invoices already imported are not affected. If you want to reclassify old invoices, you can do it in Sage 50 or ask our support team for help.
What if I have both Shopify and another sales channel (wholesale portal, Amazon, etc.) feeding into Sage 50?
Sagify can route different channels to different accounts. Define a rule for each source.
How detailed can my mapping rules be?
Very detailed. Rules can combine multiple conditions: "If product is X AND customer tag is Y AND shipping country is Z, route to account W." Most merchants use 3-5 core rules that cover 95%+ of orders.
What if an order doesn't match any of my mapping rules?
It goes to your fallback/default account. You can review unmatched orders in Sagify and decide whether to adjust your rules or update your Shopify data.
Can I map discounts and shipping to separate accounts?
Yes. You can configure Sagify to put order discounts in one account and shipping in another. This keeps your P&L clean.
How long does it take to set up custom GL mapping?
Depends on complexity. Simple setups (3-4 rules) take 15 minutes. Complex multi-attribute setups might take 1-2 hours, usually with help from our support team.
Does Sagify support multi-dimensional GL codes?
Yes. If your Sage 50 uses multi-dimensional codes (e.g., 4000-01-West) you can map to those codes specifically.
Related Reading
- The 3 Sagify Features Every Shopify + Sage 50 User Should Run - Feature overview including GL mapping
- A 7-Step Walkthrough of How Sagify Actually Works - Setup and workflow walkthrough
- Shopify Sage 50 Integration - The Complete Guide - Full integration overview
- How to Automatically Import Shopify Orders into Sage 50 - Order import mechanics
- Two Sagify Case Studies, One Lesson - Real merchants and their GL mapping setups
- Common Sage 50 Shopify Integration Issues - What generic mappings get wrong
- Is Sage 50 Good for a Shopify Business? - Why custom mapping is a must for serious merchants
Ready to get started?
Schedule a demo to see how we can help streamline your workflow.
Related articles
Shopify Bookkeeping Best Practices for Sage 50 Users
Complete guide to chart of accounts setup, revenue recording, inventory methods, tax handling, reconciliation, and audit trail for Shopify merchants.

What a Dedicated Shopify ↔ Sage 50 Integration Actually Does
Feature-level breakdown of order sync, inventory, payouts, and error handling. Contrasts dedicated integrations with generic middleware.
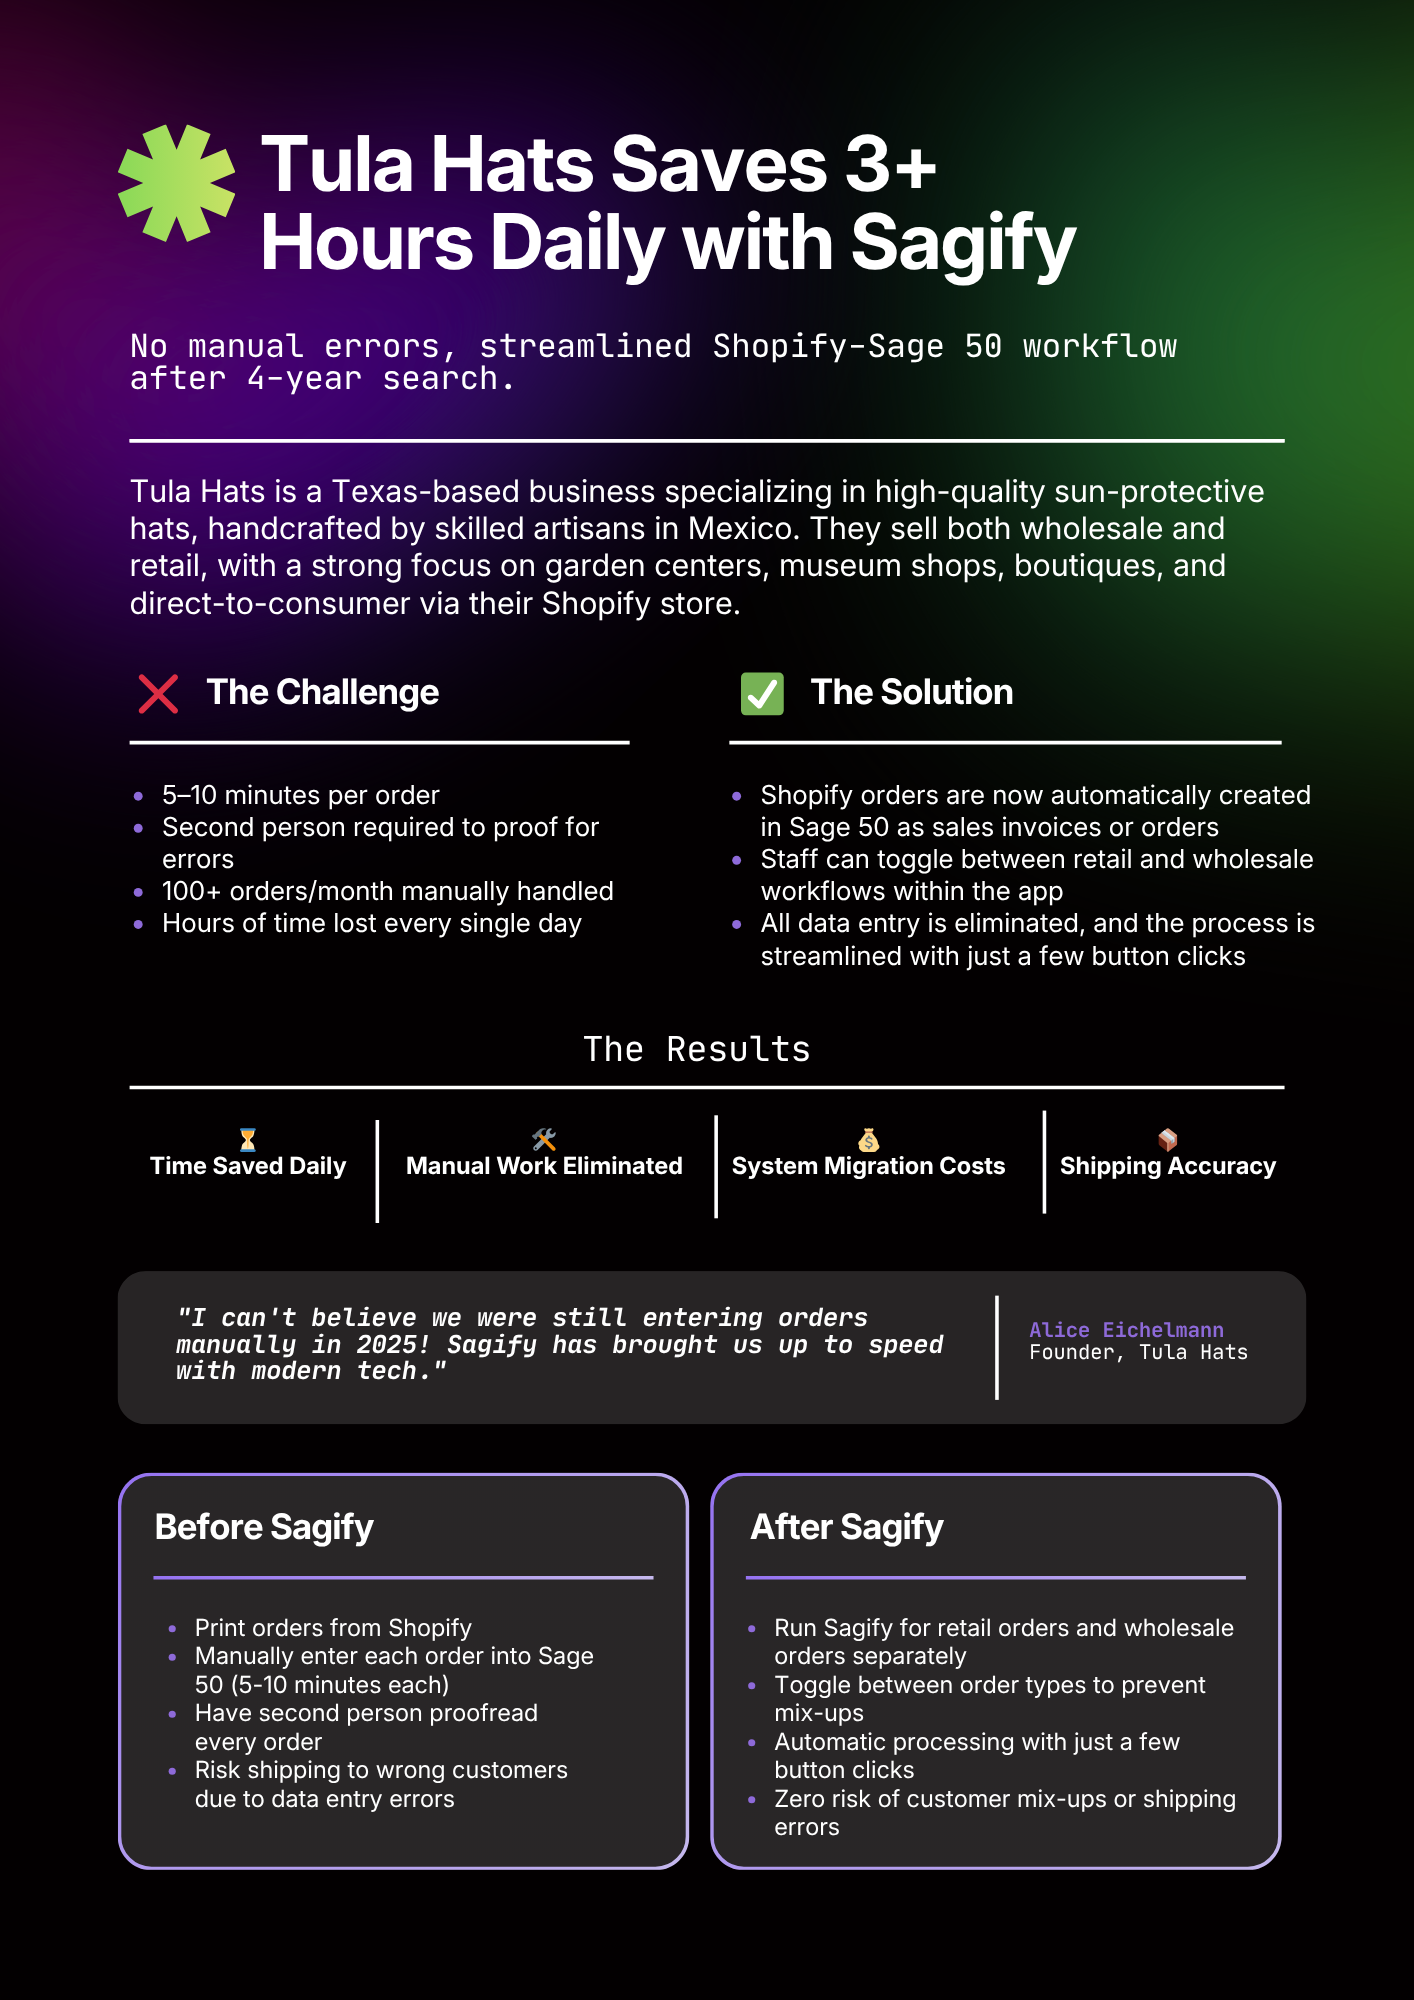
Two Sagify Case Studies, One Lesson — You Don't Have to Migrate Off Sage 50
Why Tula Hats and Emergent Respiratory didn't move to QuickBooks Online. They bridged Shopify to the Sage 50 they already trusted.